Introduction
This Complete Guide to Drywall installation will help you master the process, whether you’re working on a home renovation or a new construction project. Installing drywall is essential in modern construction, providing smooth, durable walls and ceilings while enhancing fire resistance and soundproofing.
In this step-by-step guide, you’ll learn about the best tools, materials, and expert techniques for a flawless drywall installation. Plus, we’ll highlight why professional drywall services from HD Drywall ensure superior results.
1. What is Drywall? A Complete Guide to Drywall Basics
1.1 Understanding Drywall
Drywall, also known as gypsum board, sheetrock, or plasterboard, is a lightweight, cost-effective material used for interior walls and ceilings. Its fire resistance, ease of installation, and smooth finish make it a preferred choice in residential and commercial construction.
1.2 Benefits of Drywall
- Easy to install and repair
- Fire-resistant and energy-efficient
- Provides soundproofing for quieter spaces
- Cost-effective compared to traditional wall materials
According to USG, using moisture-resistant drywall in bathrooms and kitchens prevents mold growth and extends the lifespan of walls.
For professional drywall installation services, check out HD Drywall.
2. Tools and Materials Needed for Drywall Installation
Before starting, gather the necessary tools and materials:
2.1 Essential Tools
- Utility knife – For cutting drywall sheets
- T-square – Ensures accurate measurements
- Drywall screws & drill – Secure sheets in place
- Joint compound & taping knife – For smoothing seams
- Sanding block – Helps achieve a polished finish
2.2 Drywall Types and Uses
- Standard drywall – Best for general wall applications
- Moisture-resistant drywall – Ideal for kitchens and bathrooms
- Fire-rated drywall – Used in fire-prone areas
- Soundproof drywall – Reduces noise transmission
3. Complete Guide to Drywall: Step-by-Step Installation Process
3.1 Step 1: Measure and Cut the Drywall
- Measure the wall or ceiling space accurately.
- Use a T-square and utility knife to cut the drywall to size.
- Score the paper surface and snap the board along the cut line.
3.2 Step 2: Secure the Drywall to the Studs
- Align the drywall sheets with the wall studs.
- Use drywall screws and a power drill to secure the sheets.
- Space screws every 12 to 16 inches for stability.
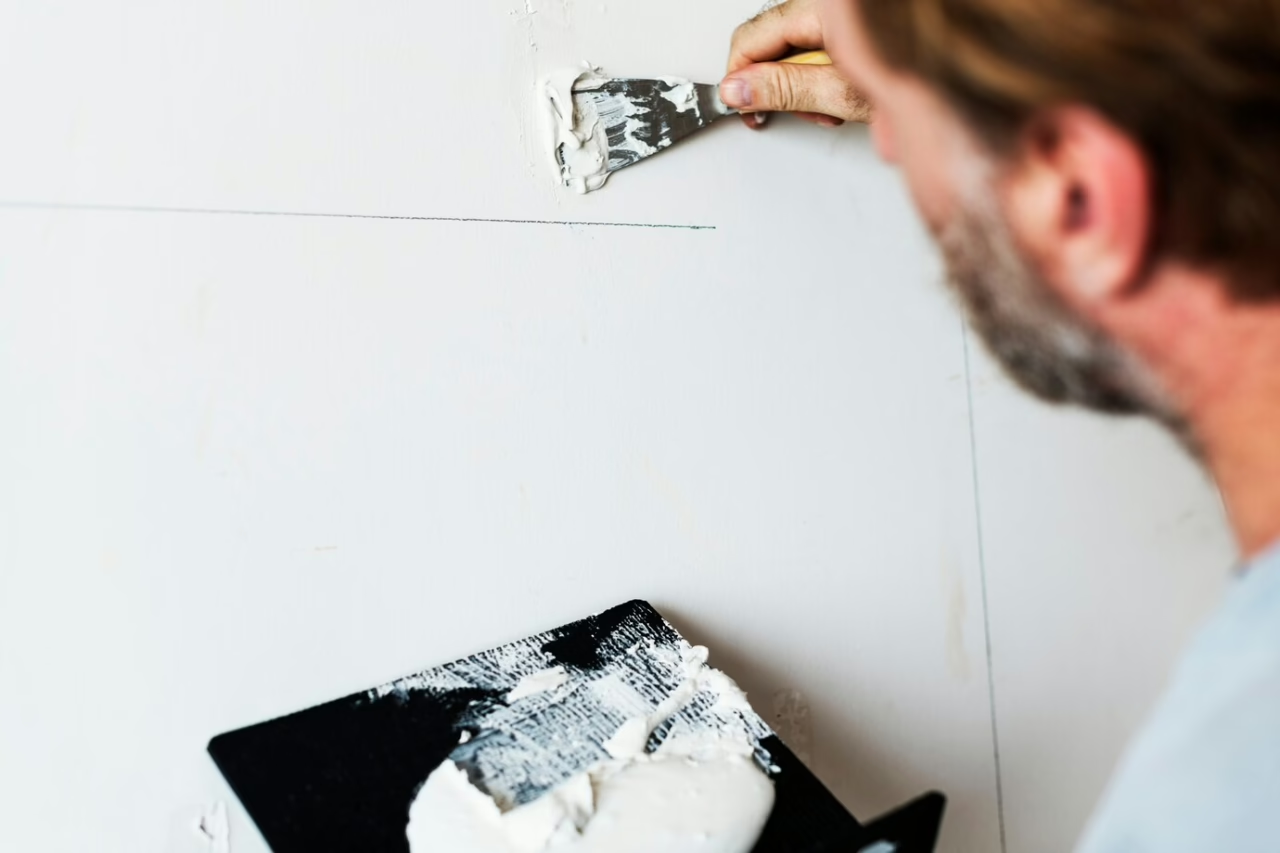
3.3 Step 3: Taping and Applying Joint Compound
- Apply drywall tape over seams to create a smooth joint.
- Spread joint compound (mud) over the tape using a taping knife.
- Let it dry, then sand it for a seamless finish.
3.4 Step 4: Sanding and Finishing
- Sand the dried joint compound to remove imperfections.
- Apply a second coat if needed and repeat sanding.
- Prime and paint for a professional finish.
For expert drywall finishing, consider working with HD Drywall.
4. Common Drywall Installation Mistakes to Avoid
4.1 Overdriving Screws
- Avoid sinking screws too deep, which can weaken the drywall.
4.2 Skipping the Sanding Process
- Uneven seams can ruin the final appearance. Sanding is essential for a smooth surface.
4.3 Incorrect Joint Compound Application
- Applying too much compound leads to excess sanding and rough surfaces.
By following best practices, you can ensure a high-quality drywall installation.
5. When to Hire a Professional Drywall Contractor
If your project is large-scale, involves complex drywall techniques, or requires soundproofing and fireproofing, it’s best to hire a professional.
Why Choose HD Drywall?
- Expert craftsmanship and years of experience
- High-quality materials for long-lasting results
- Reliable and efficient service
For professional drywall services, contact HD Drywall today!
Conclusion
This Complete Guide to Drywall provides all the steps you need for successful drywall installation. From choosing the right materials to taping and finishing, following these techniques ensures a smooth, professional result.
Whether you’re a DIY enthusiast or need professional drywall installation, trust HD Drywall for high-quality results.