How to Achieve Smooth Skin Coat Finishes: Expert Techniques for Perfect Walls
A smooth skin coat finish is the hallmark of a high-quality drywall job. Achieving this flawless surface requires a delicate touch, the right materials, and proper techniques. Whether you’re a seasoned DIY enthusiast or a professional contractor, mastering the process of skin coating can elevate the final look of your project.
What is a Skin Coat and Why is it Important?
A skin coat, commonly known as a skim coat, is a thin layer of joint compound applied to walls and ceilings. It’s used to create a smooth, even surface, especially when the drywall has imperfections like texture, minor cracks, or uneven patches. This process is crucial for ensuring that the final paint job looks seamless and professional.
Essential Tools and Materials for Skin Coating
Before starting, gather the necessary tools and materials for a successful skin coat finish:
- Joint Compound (Mud): Choose an all-purpose or lightweight joint compound for easy application.
- Trowel or Wide Taping Knife: Essential for spreading the compound evenly across the wall surface.
- Mixing Tray and Drill Mixer: For blending the joint compound to a smooth, workable consistency.
- Sanding Block: To smooth out any imperfections after the skim coat dries.
- Primer: Prepares the surface for painting and helps the paint adhere better.
Pro Tip: Use a paint roller with a nap cover to apply the joint compound quickly and evenly before smoothing it out with a knife.
Step-by-Step Guide to Achieving a Smooth Skin Coat Finish
Follow these professional steps to achieve a flawless, smooth finish:
1. Prepare the Wall Surface
Ensure the wall is clean and free of dust, dirt, or loose paint. Any existing imperfections should be sanded lightly. This step provides a good base for the joint compound to adhere properly.
2. Mix the Joint Compound
In a mixing tray, blend the joint compound with water until it reaches a creamy consistency. Use a drill mixer to achieve a lump-free mixture that’s easy to spread.
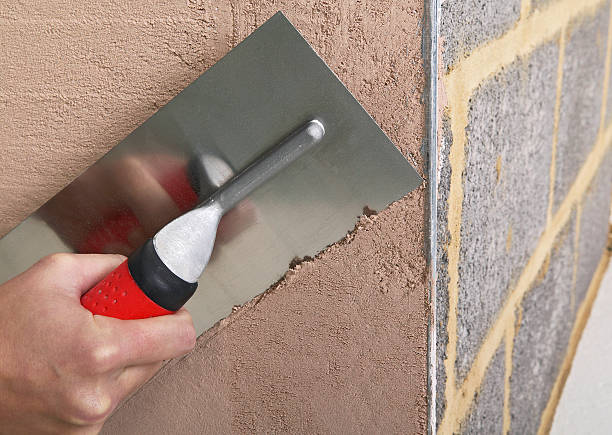
3. Apply the First Coat
Using a trowel or wide taping knife, spread a thin layer of joint compound over the wall. Work in sections, moving the knife in smooth, even strokes. Feather the edges of the compound to blend it seamlessly with the wall.
4. Sand and Apply Additional Coats
After the first coat dries, lightly sand the surface to remove any high spots. Apply a second, thinner coat of joint compound, feathering the edges once again. Repeat this process as needed, typically requiring two to three coats for a smooth finish.
5. Prime the Surface
Once you’re satisfied with the smoothness, apply a primer before painting. Primer seals the joint compound and ensures a consistent paint finish.
For professional help or advanced techniques, consider visiting HD Drywall Services.
Common Mistakes to Avoid When Applying a Skin Coat
Even with careful attention, it’s easy to make mistakes during the skim coating process. Here are some common pitfalls and how to avoid them:
- Using Too Much Joint Compound: Applying a thick layer can lead to cracks and extended drying times. Always opt for thin, even coats.
- Skipping the Sanding Step: Sanding is essential for removing imperfections and creating a smooth surface. Skipping this step results in a rough finish.
- Not Mixing the Compound Properly: Lumpy joint compound will make it difficult to spread evenly. Use a drill mixer for the best results.
Pro Tip: Use a light source at an angle to inspect the wall for imperfections before moving on to priming and painting.
Advanced Techniques for Perfect Skim Coating
For those looking to achieve a truly professional finish, consider these advanced techniques:
Spray Application
Professionals often use a sprayer to apply joint compound quickly over large areas. The compound is then smoothed out with a trowel or knife. This method is ideal for ceilings or textured walls.
Wet Sanding
Instead of dry sanding, try wet sanding with a damp sponge. This technique minimizes dust and leaves a smoother surface. It’s a great option for smaller projects or areas sensitive to dust.
Explore more expert tips at HD Drywall’s Professional Tips.
FAQs About Achieving Smooth Skin Coat Finishes
How do I know if I need a skin coat? If your walls have visible texture, minor cracks, or uneven surfaces, a skim coat is recommended to create a smooth, paint-ready finish.
Can I apply a skin coat myself, or should I hire a professional? While it’s possible to do it yourself, achieving a flawless finish can be challenging. Hiring a professional may save time and ensure a better result.
How many coats of joint compound are needed for a smooth finish? Typically, two to three coats are sufficient. However, more coats may be necessary for heavily textured or damaged surfaces.
Is sanding necessary after each coat? Yes, sanding helps to smooth out any imperfections. Use a fine-grit sanding block for best results.
Can I paint directly over a skim coat? It’s best to apply a primer first. Primer seals the joint compound and ensures the paint adheres evenly.
What is the best way to remove dust after sanding? Wipe the walls with a damp cloth or use a vacuum with a brush attachment to remove all dust before priming.
Conclusion
Achieving a smooth skin coat finish is a detailed process that requires patience, skill, and the right tools. By following these professional techniques, you can ensure that your walls have a flawless, polished look, ready for painting. Whether you’re tackling a small repair or finishing an entire room, these tips will help you achieve the best results.
For more expert advice or to schedule a professional service, contact HD Drywall.